298 lines
6.3 KiB
Markdown
298 lines
6.3 KiB
Markdown
ubuntu 部署项目
|
||
|
||
安装桌面
|
||
|
||
```
|
||
1.sudo apt-get update
|
||
|
||
2.sudo apt-get install ubuntu-desktop
|
||
```
|
||
|
||
安装远程工具
|
||
|
||
```markup
|
||
sudo apt-get install xrdp
|
||
```
|
||
|
||
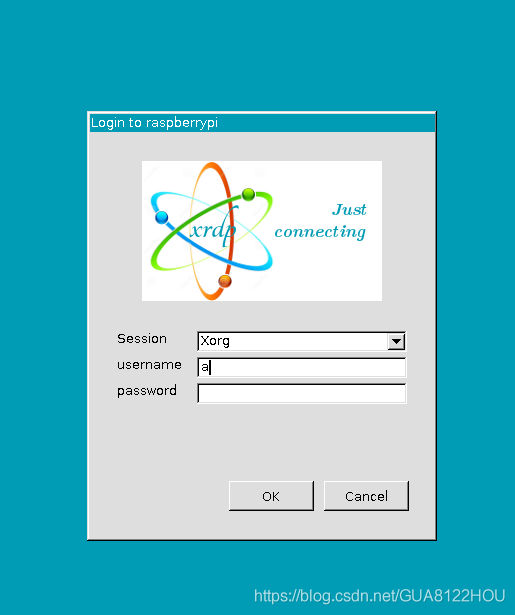
然后用win+R 键输入mstsc,进入下面远程桌面连接,输入之前的IP;
|
||
|
||

|
||
|
||
同样的输入账号和密码,就可以进入了,这个看起来就舒服多了。
|
||
|
||
|
||
|
||
## 步骤1:安装 MySQL
|
||
|
||
在 Ubuntu 上通过以下步骤安装 MySQL 服务器及客户端:
|
||
|
||
```shell
|
||
sudo apt-get update
|
||
sudo apt-get install mysql-server mysql-client
|
||
```
|
||
|
||
安装过程中,您可能会被要求设置 root 用户的密码。如果没有出现该对话框,请继续执行下面的步骤。
|
||
|
||
## 步骤2:修改用户密码
|
||
|
||
要修改 root 用户的密码,请按照以下步骤操作:
|
||
|
||
1. 打开终端,并以 root 用户身份登录到 MySQL shell:
|
||
|
||
```shell
|
||
sudo mysql -u root
|
||
```
|
||
|
||
2. 输入 root 密码以登录到 MySQL shell。
|
||
|
||
3. 在 MySQL shell 中,执行以下命令来更改 root 用户的密码(将 `new_password` 替换为您要设置的新密码):
|
||
|
||
```sql
|
||
ALTER USER 'root'@'localhost' IDENTIFIED WITH mysql_native_password BY 'new_password';
|
||
FLUSH PRIVILEGES;
|
||
```
|
||
|
||
4. 退出 MySQL shell:
|
||
|
||
```sql
|
||
EXIT;
|
||
```
|
||
|
||
## 步骤3:配置 MySQL 允许远程连接
|
||
|
||
要允许来自其他主机的连接,请按照以下步骤进行配置:
|
||
|
||
1. 编辑 MySQL 配置文件:
|
||
|
||
```shell
|
||
sudo vim /etc/mysql/mysql.conf.d/mysqld.cnf
|
||
```
|
||
|
||
2. 找到 `bind-address` 行并注释掉(在行前添加 `#` 符号),以允许来自任何 IP 地址的连接。
|
||
|
||
3. 保存并关闭文件。
|
||
|
||
4. 重新启动 MySQL 服务器:
|
||
|
||
```shell
|
||
sudo systemctl restart mysql
|
||
```
|
||
|
||
## 步骤4:修改配置,使其可以被navicat连接
|
||
|
||
1. 打开终端,并以 root 用户身份登录到 MySQL shell:
|
||
|
||
```shell
|
||
sudo mysql -u root -p
|
||
```
|
||
|
||
选择数据库
|
||
|
||
```php
|
||
use mysql;
|
||
```
|
||
|
||
更新root用户host字段 让所有ip都可以连接
|
||
|
||
```bash
|
||
update user set host = '%' where user = 'root';
|
||
```
|
||
|
||
刷新修改
|
||
|
||
```undefined
|
||
FLUSH PRIVILEGES;
|
||
```
|
||
|
||
## 步骤5:连接 MySQL 数据库
|
||
|
||
现在我们可以使用 Navicat 连接到 MySQL 数据库:
|
||
|
||
1. 打开 Navicat 工具,并点击 "连接"(Connect)按钮。
|
||
|
||
2. 在新建连接窗口中,输入以下信息:
|
||
|
||
- 连接名(Connection Name):自定义名称。
|
||
- 主机名或 IP 地址(Host):MySQL 服务器的 IP 地址或主机名。
|
||
- 端口号(Port):默认为 3306。
|
||
- 用户名(Username):root 或您创建的其他用户。
|
||
- 密码(Password):之前设置的密码。
|
||
|
||
3. 点击 "测试连接"(Test Connection)按钮以验证连接是否成功。
|
||
|
||
4. 如果连接测试通过,点击 "连接"(Connect)按钮以建立与 MySQL 数据库的连接。
|
||
|
||
恭喜!您已经成功安装了 MySQL 并使用 Navicat 连接到 MySQL 数据库。现在您可以开始管理和操作数据库了。
|
||
|
||
请注意,在执行上述步骤时,请根据实际情况调整参数和配置信息,确保正确设置密码和允许远程连接。
|
||
|
||
### 卸载MySQL [在Ubuntu中删除mysql_ubuntu卸载mysql_ccbbaaap的博客-CSDN博客](https://blog.csdn.net/ccbbaaap/article/details/130657186)
|
||
|
||
# # Reids 安装
|
||
|
||
一、安装
|
||
1.1 更新仓库(非必须)
|
||
|
||
```
|
||
sudo apt update
|
||
```
|
||
|
||
1.2 使用 apt 从官方 Ubuntu 存储库来安装 Redis
|
||
|
||
```
|
||
sudo apt-get install redis-server
|
||
```
|
||
|
||
二、设置密码
|
||
2.1 打开Redis配置文件redis.conf
|
||
|
||
```
|
||
sudo vi /etc/redis/redis.conf
|
||
```
|
||
|
||
2.2 找到# requirepass foobared这一行,将注释符号#去掉,将后面修改成自己的密码,例如,设置密码为123abc
|
||
|
||
```
|
||
requirepass 123abc
|
||
```
|
||
|
||
三、开启远程访问
|
||
默认情况下,Redis服务器不允许远程访问,只允许本机访问,所以我们需要设置打开远程访问的功能。
|
||
|
||
1、打开Redis服务器的配置文件redis.conf
|
||
|
||
```
|
||
sudo vi /etc/redis/redis.conf
|
||
```
|
||
|
||
2、使用注释符号#注释bind 127.0.0.1这行
|
||
|
||
#注释bind
|
||
#bind 127.0.0.1
|
||
四、Redis服务控制命令
|
||
|
||
```
|
||
sudo /etc/init.d/redis-server start #启动
|
||
sudo /etc/init.d/redis-server stop #关闭
|
||
sudo /etc/init.d/redis-server restart #重启
|
||
```
|
||
|
||
vim 搜索 / 加搜索关键词
|
||
|
||
# nginx 安装
|
||
|
||
```
|
||
sudo apt-get install nginx
|
||
```
|
||
|
||
其他命令
|
||
|
||
```
|
||
查看版本
|
||
nginx -v
|
||
启动nginx
|
||
service nginx start
|
||
查看运行状态
|
||
service nginx status
|
||
重启nginx
|
||
service nginx restart
|
||
sudo systemctl restart nginx
|
||
```
|
||
|
||
安装后的文件目录
|
||
|
||
```
|
||
/usr/sbin/nginx:主程序
|
||
/etc/nginx:存放配置文件
|
||
/usr/share/nginx:存放静态文件
|
||
/var/log/nginx:存放日志
|
||
```
|
||
|
||
# 安装JDK1.8
|
||
|
||
```
|
||
sudo apt install openjdk-8-jre-headless
|
||
java -version
|
||
```
|
||
|
||
# 后端启动
|
||
|
||
```
|
||
nohup java -jar youchain-system-2.6.jar --spring.profiles.active=prod > nohup.out 2>&1 &
|
||
```
|
||
|
||
## 后端停止
|
||
|
||
```
|
||
#!bin/sh
|
||
PID=$(ps -ef | grep youchain-system-2.6.jar | grep -v grep | awk '{ print $2 }')
|
||
if [ -z "$PID" ]
|
||
then
|
||
echo Application is already stopped
|
||
else
|
||
echo kill -9 $PID
|
||
kill -9 $PID
|
||
fi
|
||
```
|
||
|
||
# **查看日志脚本**
|
||
|
||
```
|
||
tail -f nohup.out
|
||
```
|
||
|
||
# 前端部署nginx 配置
|
||
|
||
在http{} 中添加server
|
||
|
||
```
|
||
server {
|
||
listen 8090;
|
||
server_name 101.35.240.82;
|
||
root /home/ubuntu/dist/;
|
||
location / {
|
||
try_files $uri $uri/ @router;
|
||
index index.html;
|
||
}
|
||
location @router {
|
||
rewrite ^.*$ /index.html last;
|
||
}
|
||
}
|
||
```
|
||
|
||

|
||
|
||
```
|
||
listen 为端口号
|
||
server_name 域名/当前服务器外网IP;
|
||
root /home/ubuntu/dist/ #dist上传的路径
|
||
```
|
||
|
||
Linux 常用命令
|
||
|
||
```
|
||
切换文件夹:cd ../../
|
||
|
||
查看命令:sudo vim nginx.conf
|
||
|
||
启动java服务:sudo sh ./start.sh
|
||
|
||
停止java服务:sudo sh ./stop.sh
|
||
|
||
启动mysql服务:sudo systemctl start mysqld
|
||
|
||
停止mysql服务:sudo systemctl stop mysqld
|
||
|
||
重启mysql服务:sudo systemctl restart mysqld
|
||
|
||
启动redis服务:sudo /etc/init.d/redis-server start
|
||
|
||
关闭redis服务:sudo /etc/init.d/redis-server stop
|
||
|
||
重启redis服务:sudo /etc/init.d/redis-server restart
|
||
|
||
启动nginx服务:sudo service nginx start
|
||
|
||
重启nginx服务:sudo systemctl restart nginx
|
||
```
|